Tag Archives: photography

Dodging and Burning – An essential skill and a new ebook to help learn the basics…..

Many of us “old timers” got our start with film cameras and darkroom work with chemicals and all kind of trial and error methods to bring out the details in our photos like dodging and burning. I remember having all kinds of funny shaped cardboard pieces on little pieces of wire and cardboard with cut outs and sometimes just using your hand to help bring out details in a print. In newer terminology to bring the full dynamic range to view on a nice print. Today, of course, we can use computers, so instead of throwing away trial prints we can edit and experiment. Especially with tools like Lightroom, the changes are all parametric and we can always go back and re-edit. You can still do that with Photoshop but it takes a little more effort. Now we use pen tablets and a mouse to apply and change the areas, to make the highlights and shadows as we remember the scene or how we want it to look. All of us go through various learning curves and it is always useful to learn new techniques, so that brings us to the subject of this post. Here is a new ebook, available from the fine people at Craft and Vision. This new ebook is quite a package, it includes an ebook on Dodging and Burning, including lots of examples, but it also includes some Actions for Photoshop and a custom Panel for interacting with the Actions. The sample images discussed in the book are included so that you can follow along exactly with each step. These are set up for Lightroom 4 or Photoshop CS6, while they will work with earlier versions these are recommend because of the improvements that were implemented with the new Image Process in Camera Raw. Trial versions are available for download from Adobe. In case you are wondering about cost, the normal cost for this fine package is $10, however if you use the code “DODGE8” during checkout, it will only be $8. This is only for a limited time, so go and get the Dodge&Burn ebook through this link and use the code before midnight on July 22, 2012. The Craft and Vision book store also has a package deal, for the same limited time, in which you can get 20% off 5+ ebooks from the site, the code is “DODGE20”.  All of the books are worthwhile, however I recommend in addition to the Dodge&Burn, ebook to take a look at Up Close, Exposure for Outdoor Photography, Making the Print, and the Power of Black and White. There are many others that are excellent but those will give you some great information.

So be sure to check out the ebook, and learn how to Dodge and Burn effectively, bring up those shadows and modify the highlights to match your initial vision when you took the picture.  This is an art that does take practice and there is certainly many ways to accomplish the same effects but this book will give you a great start and some insight into improving your images. Not only are the traditional type of modifications discussed but also uses of sharpening, and tonal effects to add some depth to your vision. How to effectively do it in a non-destructive fashion in photoshop, but also how to use some of the tools from Nik Software as a way of making it more efficient.

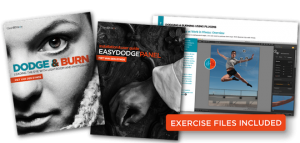
 

Image of the week #26

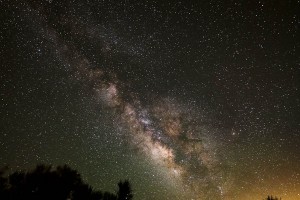
Hard to believe half the year has gone by, I guess that is the sign of getting older, time flies! Here is this week’s image, it was more an experiment but I like how it came out. I got an adapter for my Fuji X-Pro 1 to use my Canon lenses, so this is taken near Temecula with the X-Pro 1 and a Samyang 14mm f2.8 lens, taken at f2.8 and a 30 second exposure at ISO1600. I thought it turned out pretty well, the yellowish glow in the bottom right is the light pollution dome from San Diego. The summer Milky Way always a neat thing to see. Enjoy.


Image of the week #24

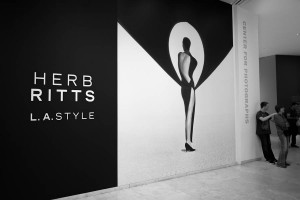
While at the Getty we took a look at the Herb Ritts exhibit, really worth going to see. Amazing images, really creative and great lighting. I was quite impressed with the images and highly recommend anyone interested in photography to go to the Getty and see the exhibit. I am going to go back and take another look, really very creative uses of lines, shapes and light. This shot is taken at the entrance to the gallery, no photography is allowed in the exhibit. Taken with a the Fuji X-Pro 1 18mm f2 lens, 1/80 at f2 and ISO 400, converted to black and white using Lightroom.


Image of the week #23

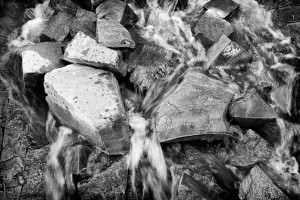
This week’s image comes from the Getty Center. Taken with a Fuji X-Pro 1 and 18mm f2 lens, setting were ISO 800, 1/25 at f8. I  love black and white and not all images work well in black and white, but I felt that this one did, hope you did too.


Image of the week #22

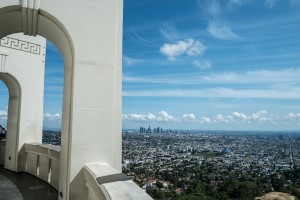
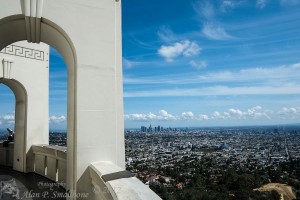
I am really liking my Fuji X-Pro 1, wonderful small camera with really great image quality. I pretty much carry it with me every day. Here is a shot from the Griffith Park Observatory looking towards downtown Los Angeles. This was shot with the Fuji X-Pro 1 and the 18mm f2.0 lens at ISO 200 and 1/350 at f11.


Fujifilm X-Pro 1 – Some of my initial thoughts on this camera.

I saw the previews and the early announcements of this camera and I was intrigued. It had a lot of really interesting features. First it was relatively small, it looked like a rangefinder camera. I never had a film rangefinder but I was certainly aware of them and this was definitely a look alike but with enhancements and features that make it a modern camera. It looked like the new Leica digital M9 but without the hefty price tag. The sensor was something new and different and it also lacked an anti-aliasing filter that can blur details, yielding a potentially sharper image. So I waited and read about the camera.

The camera was released in March/April timeframe and when it was available and in stock I rented one with two lenses from Lensrentals.com.  I have been shooting DSLR’s for many years and film SLR’s before that so I was not sure how much I would use a camera like X-Pro 1 but I was really intrigued with the features and potential. Being in kind of a photographic slump it was not always convenient to drag around a large DSLR and lenses so I was shooting less than normal. My wife has a wonderful Canon G-10 camera, I like this camera, a small compact but it was also lacking something. It was not image quality, as the G-10 is a fine camera, but it lacked some of the features that I liked with DSLR’s, like the ability to change lenses and fiddle around with manual focus, and other minor details.

So in comes the X-Pro 1. Interchangeable lenses, hybrid viewfinder, feel of a film camera, a bit of nostalgia in the controls, the ability to fiddle to my heart’s content and the promise of excellent image quality, that is why I had to rent it to decide if I really would want, use and desire this camera. I see many people on various forums that order a camera and use it and then send it back if they feel it is not for them, I personally do not like to do this, to me it does not “feel” right to do that, unless it was really an honest mistake in purchasing or there is something wrong with the camera. Sending it back after using it, to me is just an abuse of generous store policies, and only serves to increase overhead which affects all us consumers, but to each their own. After renting it, I really enjoyed it, so I went ahead and bought one with the 18mm and 35mm lenses.

The camera to me has a really nice feel, small but  not  too small,  it feels like a usable camera. The lenses are small and lightweight but well constructed of metal  and not plastic. The current ones that are out are all fast primes, which will appeal to the more experienced photographer. It really does appear that Fujifilm chose to target the experienced photographer, the  more advanced amateur and professional and it could be used by a beginner but it may not appeal to them at first. The camera just seems to want to be used to take deliberate photos and not so much the snapshot, in other words it is something better than a camera phone. The controls are such that it can go from fully manual control to completely automated, menus are quick and easy to access and there are ways to configure and customize. There are enough reviews and previews on the web that it would just be redundant here to cover every single detail.

What I love about the camera besides the handling, are the images. Clear, beautiful images are easily made with this camera. To me the small footprint and the ease of handling and carrying around created a spark, it really begs to be carried around and used. Will this mean I won’t use the DSLR? Absolutely not, it will never replace those but it is nice addition to the tools available.

Some of the forums have had lots of comments about the focusing capabilities of the camera. Is it perfect? No it is not perfect, but it is perfectly usable. If you spend some time learning to use the camera and get a feel for how it operates it will be a fine tool. If you think you can run out and blast away and “spray and pray” and expect them all to be perfect, then you need to realize that is not going to happen. The X-Pro 1 is a deliberate camera, and it should be handled and focused with deliberation. I think many of the “issues” and complaints from users are due to they are not understanding the limits of this focusing system.  They seem to be coming from DSLR’s where the focus is very fast but it is a different system. A DSLR uses a phase detection system, using dedicated focusing sensors in an array. Different cameras will have different arrays of sensors but that kind of sensor is known to be fast and accurate. The Fuji X-Pro 1 uses a contrast detection system that is slower and is not as accurate as a DSLR. The X-Pro 1 could stand for some improvement in the software and it could be a lot faster and more accurate than it is, but it is perfectly usable and relatively fast if you use it correctly.  I personally use the multi-area mode with a single focus point in the middle and the “S” focus mode instead of continuous focus. This mode will allow for the camera to be focused when the shutter is half pressed or if the camera is configured for it, if you press the AL button. The photographer also needs to point that focus point at something that has reasonable contrast. In general  that will work well. There are times another spot must be chosen, once focus is established the photographer can then recompose and finish off my completing the shutter press.  Another workflow that works well is to set the camera into “M” for manual focus, then focused by pressing the AL button and then focus will be set for that area. This will act as a single shot autofocus or as a zone focusing system. I believe that Fujji will release further updates that will improve the focus ability, they really seem to listen to customer feedback, which is refreshing. I would really like to see “focus peaking” to be added as well as improvements to speed. However I can use it just fine now. The “focus peaking” will be really useful for manual focusing, which is needed for using none Fuji lenses. Currently the easiest way to manually focus is to use the EVF and use the in camera magnification to check the focus accuracy.

The image quality is fantastic. Currently I am shooting raw+jpg mostly because Adobe has not yet released support for the raw files. I always shoot raw files and process them in Lightroom and Photoshop, but this is not going happen until Adobe releases their support. I hope it is soon, they have said they are currently working on it. Fujifilm does give you an OEM version of Silkypix for converting raw files. Silkypix works, but the interface is clunky, and the learning curve is fairly high to get a decent image out of it. However this is not as bad as it may sound because the out of camera jpgs are truly amazing. I never shoot jpgs with the dslr because they never look that good, but the Fuji jpgs are wonderful. The sensor used in the camera is very unique and generates beautiful image quality, that can only get better when we have some decent access to the raw files. The jpgs are sharp and rival what I can get with my DSLR’s with beautiful color and truly impressive high ISO capability. The high ISO capability certainly looks better than my DSLR but I will make a true comparison with the raw files at a later time. The high ISO from the Fuji is very clean and has low noise and a very natural looking grain at the extremely high settings.  The camera also has “film” emulations settings that get applied to the jpg, classic Fuji films like Velvia, Provia, etc. Also a black and white mode and a black and white with filter setting to emulate the use of various color filters commonly used in black and white film photography. Another interesting feature is that the sensor is sensitive to IR, enough so that if the user puts an IR pass filter on the lens, like a R72, infrared images can be captured. The IR pass filter only allows the IR band of light above 720nm to pass through to the sensor, visible light is blocked. The camera will even autofocus with this filter in place, the lcd and EVF make it easy to compose IR images.

Another innovation is the viewfinder. It is a hybrid viewfinder, it has an optical mode, and an electronic mode, and if the user does not want to use it, there is a nice large lcd display on the back of the camera. In optical mode the camera can display a lot of information if the user chooses to, almost like a heads up display. There can be an artificial horizon, grid lines, exposure setting information including, aperture, shutter speed and ISO. Also a “live” histogram is displayed so that the exposure can be set and modified easily, exposure compensation is shown and easily accessed. While looking through the view finder the photographer will see an approximation of the field of view with some framing lines, this is not as accurate as it could be, but usable. Also the focus point can be selected and moved. The user can also, with the flick of the switch, change to the electronic viewfinder which will show what the sensor is seeing, so the best of all views can be selected easily and quickly. I really enjoy the live histogram.  The parallax view through the optical finder and the display area are something that the user can adapt and get used to with some experience and use. When an exposure it taken the image will flash in the viewfinder for a short time so that it can quickly be verified, a cool feature, discrete chimping!

A shutter release can be used but it is the old style manual cable release, good thing I still had one from my film days.  Sure wish it had an electronic release so that an interval timer could be use, but still not a deal breaker and part of the retro feel to the camera.

The lens quality is very good, quite happy with the ones that are available and Fujifilm has released their “roadmap” for lens development, and some zoom lenses with image stabilization and some more fast primes will be available over the next two years. There has also been a flood of lens adapters from a lot of dealers, especially ones from China. The camera has a very short lens flange to sensor distance and so this makes adapting many dslr lenses easy as well as standard rangefinder lenses. I picked up a Canon FD lens adapter. It has breathed new life into my old manual focus film lenses. I have seen many others, including adapters for rangefinder lenses like the Leica M-mount, so the photographer is not limited. Fuji also includes a menu item in which the user can set the lens focal length when a manual lens is attached, so it is documented in the image EXIF. Currently the camera will only focus and set the aperture of Fuji lenses, but who knows that might change from the people at Metabones, that is only a guess and perhaps a wish to get an EOS lens adapter with auto aperture!

To me this is an exciting camera. A tool with some innovative features that can take quality images that rival high end DSLR’s. Is it a perfect camera? No, it is not, but then I do not think there is such a thing. Not all people can be pleased and there will always be compromises some might think of them as features but since there are many different opinions, it is not possible to please everyone. I think the camera will appeal to those who are more advanced or more interested in the “art” of photography. It will also appeal to some gearheads. It will not appeal to those who are trying to replace their DSLR, or sports photographers or action photographers. That does not mean they cannot use it, but it means that there is a different purpose in mind. It will not appeal to the “spray and pray” crowd of photographers.  To me it is a great supplement to my DSLR, something that is easily carried around to capture a moment, or to inspire and create. I think cameras are tools, brushes to be used to paint a photographers vision. Sometimes I get carried away with the technology, we do live in interesting times, but it is nice to regroup and rally around the reason to photograph, to capture our visions and inspirations, and at least justify the new expensive toys and to actually get out and use them! The more I use it the more I am enjoying it, so I am sure this not the last time I will write about it.


Image of the week #17

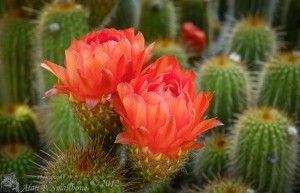
Spring is a fun time of year, here in L.A. it can mean anything from hot spells, to rain, to grey overcast skies, and this year it was a little strange. First we got hardly any rain during our normal rainy season and had heat instead, the lack of rain and heat really messed up the normal wildflower prospects. So you have to wonder to other places to find some flowers. This weeks image is from the Huntington Library gardens. They have a very nice cactus section and a lot of them were in the processing of blooming.  This weeks image was also taken with my new camera, the Fuji X-Pro 1. I really like this new camera, a very nice and compact, well at least more compact than the dslr I normally use. Great optics, great image quality and all packaged in an interesting retro kind of case. A nostalgic trip back to rangefinder type cameras, although not a rangefinder per se, the handling is very similar. Great camera. Since Adobe has not released the raw file processing ability I have been using the in camera jpgs and it is capable of generating great images. This weeks image was taken with the Fuji 35mm f1.4 lens and using the Velvia film simulation mode. I bracketed the exposure and blending the files using exposure fusion. Hope you enjoy it as much as I do.

Image of the week #16

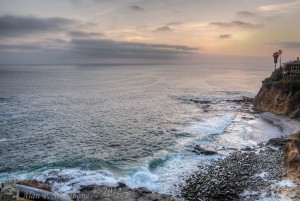
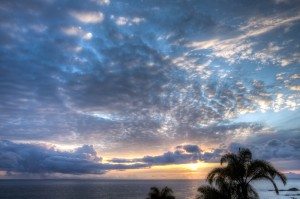
I was watching this sunset and really liked the clouds and the layers so I grabbed the Fuji X-Pro1 and fired off a few shots. Originally I was hoping that the setting sun would illuminate the clouds and light up the sky, but it turned out it was a more subtle sunset. Even though my original thought was to get something more dramatic I am quite pleased with this sunset as the storm clouds were beginning to break up and the storm was clearing. Taken in Laguna Beach, CA. Lens was an 18mm. Enjoy.


Image of the week #15

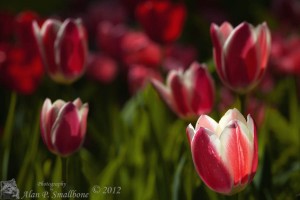
Spring is here, flowers are out and the weather is definitely getting warmer, and warmer. Since we seem to go into extremes, cold then hot, it can make it rough on finding spring flowers. So when the wildflowers are not producing, the gardens get worked. This is from Descanso Gardens, they always have a nice display of tulips.  The was taken in a patch that was partially shaded and what I did was accentuate the shadows and the highlighted areas.  The translucent appearance of the tulips when backlit caught my eye. Taken with a Canon 5DmarkII and 70-200mm f4 at f4 and 163mm. Enjoy.


Portraits

Portraits: a lot of photographers make their living taking them but they are a subject I seem to not do very often, so I have set out to change that a bit. Part of my quest has also involved lighting and learning how to light without relying on natural light. I usually prefer natural light but it does not always cooperate when you need it. I think I am finally feeling a bit more comfortable about using flash and have a better understanding in how to use it and how to set it. I had a lot of previous misconceptions and always used to rely on the camera to set all the flash settings, and I often found out that was not optimal. Yes it did light the subject but often in a way I did not find appealing so I am slowly getting more familiar with how to control it. Manual control is your friend!

Portraits are hard for me, mostly because of lack of experience I think. I also am a relatively shy person especially with people I do not know. This last weekend I tried to take the hardest portrait of all…. the self-portrait. This is difficult for a lot of reasons, primarily the subject and the operator are on the same side of the lens, which makes controlling the camera a bit difficult. One option is to use a remote and a self timer and just start guessing. Or have a stand in to use for composing and framing and focusing and then do the footwork to take the image.  The option I chose was to use my Motorola Xoom tablet! There is a nicely done application from the Android Market called DSLR Controller and it works great for controlling the camera. I was able to hold the tablet in my hand while in front of the camera and see the live view of what the camera was seeing. This allowed me to focus, change exposure, take images and review them and either delete them or let them stay on the memory card. This setup actually made it fun and left me to play with the lighting and the exposure. Of course the subject matter I was stuck with and I did not have to entertain or relax the subject. Here is one of the attempts that I liked.

 I had my camera setup on a tripod and the Xoom tablet attached via the usb cable, so I was able to focus and control the exposure and camera settings from the tablet while I was staring into the camera lens, how cool is that? I used two speedlights, the first was off to my right and fairly high up, this 580exII had a Honl travel softbox with a warming gel, set at about 1/2 power. Behind me was another flash that had a small grid and a purple gel. The grid made for a small spotlight effect, I wanted to create some feel of separation from the background. A very simple and easily transportable setup.

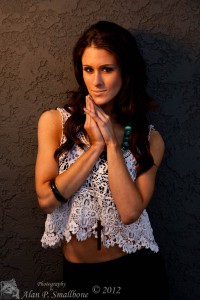
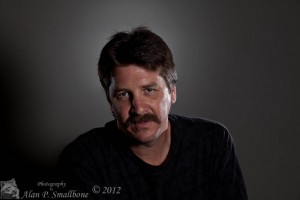
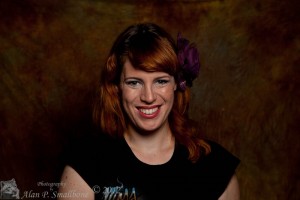
Below are a few more examples of portraits that I have made using a similar setup, but I was behind the camera this time, this was from a class I took on using off camera flash.


So where does this leave me? Well I am getting the technical aspects down but what else is there? I am quite happy with these, but there is always room for improvement. That is the great and interesting thing about photography is that it is a constant challenge.

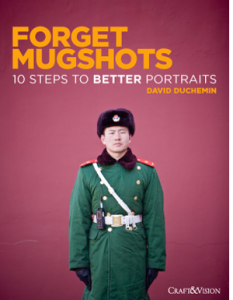
The team at Craft and Vision, who publish some really excellent ebooks, have come out with an ebook dealing with portraits. It is written by David duChemin, who takes some fabulous portraits. Here is a shot of the cover, and it is called “Forget Mugshots  10 steps to better portraits”


This book  is not meant to cover the technical aspects of taking a portrait, it gives you some insight in how to get a portrait that is attractive and has a sense of emotion.  This is all about how to make a compelling and natural looking portrait. Things like engaging your subject to make them relax, how to get the person to open up and act natural. There are some interesting and compelling things to try, exercises to help the photographer break out of the mold of standard cut and dry portraiture. He also shows some examples and talks about the methods he uses to break down the barriers. A lot of what he says will help you break out of the mold and step away from conventional thinking to apply creativity and create portraits that you and your subject will both enjoy. David duChemin has a really down to earth manner of writing and is really good at stimulating thinking about improving your own vision, I find him to be a good motivational author.

This ebook is available for the nominal price of $5 and if you order it before March 17 you can get it for $4 using the code: “Mugshots4” when you check out. Click here to visit Craft And Vision.  You will also find a lot more useful and informative ebooks there. Well worth checking out some of the titles. If you do decide to purchase 5 or more ebooks enter the code “Mugshots20” and save 20%. Remember these codes expire at midnight on March 17.

I hope that this will get others to look into doing portraits and I am always happy to answer questions, and if you want to have your portrait taken….please feel free to contact me. Thanks.