Tag Archives: X-Pro 1

Rokinon 12mm f2.0 for X-Mount – a first look

_MG_3048-web

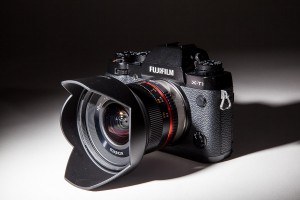
Rokinon 12mm mounted on the X-T1

The Samyang/Rokinon 12mm f2.0 for x-mount was recently announced and has arrived in the stores. Samyang is the original manufacturer and the lens is also rebranded and sold under several names, including Rokinon.  I ordered one to take a look, nice and compact and it was certainly priced right. It is manual focus, manual aperture with no EXIF data being sent to to the camera, which is something that really irritates me, but oh well. At least Fuji anticipated that people might use other brands of lenses that might not provide that information so you can at least set the focal length using the camera menu. This allows you to identify the lens when you are using it in the field, but you do not get any aperture information.

I received my copy of the lens, packaged well for shipment in a plastic shell with a small manual and small cloth bag to hold the lens if needed in the camera bag. The lens shade is detachable and made from plastic. The locking mechanism  for the hood seems a bit weak and may wear after some on and off use, maybe not but I do not have a lot confidence in it. The aperture ring is smooth and has half stop detents from f2 to f22. The end of the lens barrel is threaded for 67mm filters. The focusing ring was smooth and gives a nice feel when focusing. The lens itself seems to be well built and rugged, it is not weather sealed. When inserted into the camera there is some play, it did not lock in place firmly.  I was able to twist and shift it a small amount between the stop in the lens mount, since there are no electrical contacts this should not really be a problem, although I wished it would lock in place better, this might be just manufacturing tolerances. The lens is light enough that it balances well with the camera.

Static testing

Distortion test

Distortion test

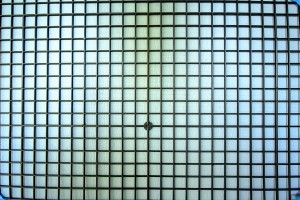
So off to shoot a few sample images. First off I wanted to see what kind of distortion I might get from a lens this wide. I figured there would be some distortion, it is hard to make a completely rectilinear lens and this was not an expensive lens by any means. The Samyang 14mm lens for dslrs had a really strong moustache type distortion which could be problematic.  So for my first target I set up a grid made from a filter from an air conditioner, it was   setup to be level and the camera was mounted on a tripod and square and level to the grid. As you can see from the image there is very little distortion. A small amount of barrel distortion that would be easily fixed in post processing, when and if you really needed to fix it, it most shots except for architecture you would probably not notice it.

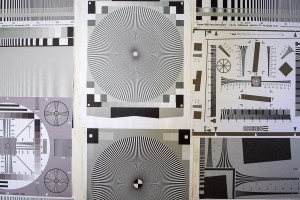
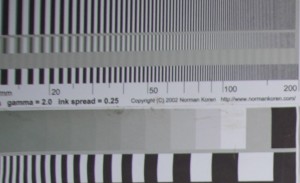
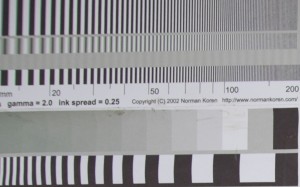
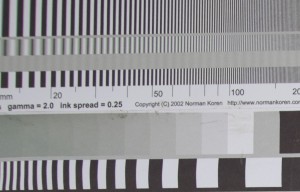
One troubling thing, if you look on the image to the left is the yellowish color in the middle from the top to the bottom of the frame. This is not the color of the wall, and I did see this on the screen while taking the images, it is present in the images. The wall that this is on is a uniform blue color. It looks like it might be some issue with the coating or the type of coating with this lens, I don’t know if this is just my sample. So I brought out my other test chart. By the way these test charts are just something I threw together for me to see how lenses perform, other than careful alignment and doing the best I can to level and keep things straight, there is some room for some error. Not scientific at all so remember that.  Anyways, the next chart is made from some lens test charts by Norman Koren, downloaded and printed on white paper with my epson printer. They are mounted to a foam core board that is slightly yellowish and there are some spray glue remnants, remember this is not scientific, just my take on testing.

Up the chart went and everything was aligned. Test images were taken at all apertures. My purpose for this test was to see corner

Lens sharpness and vignette testing

Lens sharpness and vignette testing

sharpness and vignetting and overall lens sharpness. This image to the right was shot at f5.6 and also shows the same yellowish patches from the lens. Again this is disturbing. However, the lens is pretty sharp overall. Especially in the center, which is pretty typical of ultra wide angle lenses. At f2, which is wide open for this lens, it is somewhat soft, however the sharpness is acceptable at f2.8, both center and edge. The corners do not really get sharp until around f4 without sharpening applied and pretty good at f5.6. Below in the gallery are some corner crops from the upper left corner. Also there is pretty significant vignetting at f2 and gets reasonable at f4 and beyond. Click on the images to see larger versions and for the corner crops they are 100%.

Corner crop f2.0

Corner crop f2.0

Corner crop f4

Corner crop f4

Corner crop f5.6

Corner crop f5.6


Real world imaging

As I mentioned the color cast in the middle might not be noticeable in real world images. I did go out and shoot a few images in the real world.  These are shot at f11. The first was hand held and the second was on a tripod. Click on the images to see larger versions.

Cormorant statue at the park

Cormorant statue at the park

A view up the coast

A view up the coast

Here is a comparison shot with the Rokinon 12mm at f11 and the Fuji 10-24mm at 10mm and f11. The tripod was kept in the same location, just the lens was changed in between shots. You can see that an extra 2mm can make a difference in the field of view.

Fuji 10-24mm at 10mm and f11

Fuji 10-24mm at 10mm and f11

Rokinon 12mm at f11

Rokinon 12mm at f11

Conclusions

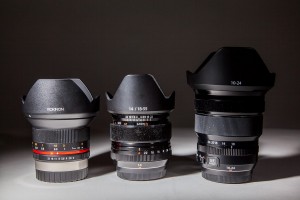
I was really hoping that this was going to be a great lens, the price was great, and Samyang has made some great lenses in the past. This lens is a little smaller than the Fuji 14mm f2.8 and has the same focal length as the Zeiss Touit 12mm f2.8 but at half the price. This price differential is what was really appealing for the Samyang/Rokinon lens. The build quality is there, the minimal distortion and the pretty good control of vignetting, and the corner sharpness even at wider apertures make this a really wonderful lens. The only thing that could be a problem is this discoloration I saw in my static testing. I am hoping this was just an aberration of my testing or my copy of the lens. I will give another lens a try and see if I can get a better copy, but before I send it back I will redo some of the testing on some different subject matter. The reality is that it is probably not noticeable, but I know some light colored building I will have to give it a try and see before I return it.

Is this a replacement for the Fuji lenses? No I don’t think so, it might be a nice addition or if you are on a budget it might be a good lens to get. It is really hard to beat the Fuji 14mm f2.8 or the Fuji 10-24mm f4, they are very high quality lenses.

Comparison of Rokinon 12mm f2.0, Fuji 14mm f2.8 and Fuji 10-24mm f4 lenses

Comparison of Rokinon 12mm f2.0, Fuji 14mm f2.8 and Fuji 10-24mm f4 lenses


Thanks for looking and I will update this when I have anything to update.


Pimping the X…..

Have you ever noticed that nothing is perfect out of the box?  They can be close to perfect but soon you notice a few wrinkles. A little more time and then comes the need for some enhancements. I am not talking about that “eX”, there is little you can do about that, but I am, of course talking about the X-series cameras from Fujifilm. These compact wonderful little cameras just beg for a little enhancement. Some of the enhancements are just cosmetic and maybe you have gone through that with your “X”. There are some that are really needed to enhance the experience and the usability. Let’s take a look.

Grips, tripod plates, thumb rests and other handling enhancements.plates-web

Lets face it, these are small cameras and there can be some issues with handling. They were not as problematic as I envisioned them. When using the X-Pro1, X-E1, or X-E2 I think a Thumbs Up thumb rest is a mandatory item. It gives me a nice comfortable but firm grip with my thumb, the disadvantage is it uses the hot shoe so it has to be removed when using the flash or a flash trigger.  That is unless you use the sync port on the X-Pro1 or X-T1. It does prevent me from hitting buttons on the back of the camera as easily by mistake. Yes the original Thumbs Up is expensive but it is well made, fits perfectly so you pay a bit more for a quality product rather than cheap knock off. It always surprises me when people gripe about the cost when they spend $500 on a bag to carry the camera, but I guess it is all relative. The X-t1 has a different design for the body and does not lend itself to the use of a thumb grip, like the rangefinder style cameras.

Soft release is another essential item for the X-series at least up to the X-T1. At first I thought the soft releases were just joke and how could they make the shutter button better? Well once again, use and testing revealed otherwise. The cameras up to the X-T1 have a screw in shutter release capability, just like the older film cameras, the soft release screws into the shutter button and really does change the feel of the button and how it operates. I wish the X-T1 could use one, although I see that at least one manufacturer has a stick on version for the X-T1 now. The button on the X-T1 does feel pretty good, or I am just getting used to it, since there are not many options.

When doing landscapes, nightscapes, and long exposure photography a good tripod mount is needed. Fuji in their infinite wisdom (sarcasm alert) decided to put the tripod mount screw offset from the lens center and close to the battery door. I don’t know what they were thinking, any kind of quick release plate and you are blocking the battery door. The grip for the X-Pro1 was nice in that it attached to the bottom, gave a nice larger grip to hold and moved the tripod screw to the centerline of the lens but they still blocked the battery door!!! Well Really Right Stuff to the rescue. I use Arca-Swiss compatible ball heads so the RRS L-plate incorporated the ability to use the Arca-Swiss style ball head, and still allowed access to the battery door without having to remove the plate. The RRS plate also has an optional grip but I found it unnecessary on the X-Pro1. The RRS has a better build quality and is well worth the extra few dollars than the cheap knock-offs. They are currently developing an L-plate for the X-T1. The optional grip attachment just did not feel right to me, it was machined aluminum and I like the leatherette feel like on the body and that grip extension just changed the feel too much and added some weight to the camera.
For the X-T1, Fuji did listen to customers and critics and came out with two different grips. One is a battery grip that holds an extra battery as well as additional controls for use while in the portrait orientation. I originally thought I would find this an essential item, like I did for my dslrs, but for this camera I do not think it is needed. You do get the extra battery and so it would take twice as many images on a charge, but when it comes time to change the batteries, you have to take the grip off to change the battery in the camera. That could be tiresome but I guess you would get used to it. The attraction to me for these cameras is the compact size and I am sure that the battery grip is useful, I think it changes the camera to one that is no longer as compact. This commentary on the battery grip is coming from not actually handling one but after handling the X-T1 I just feel it does not need the added weight. I reserve the right to change my mind!

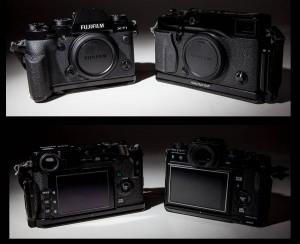
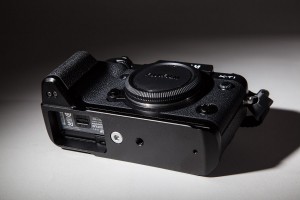
They also made another grip, that adds a thin bottom plate that is also Arca-Swiss compatible as a quick release plate for ball heads, and it added some extra grip to the front of the camera. And low and behold, you can access the battery and change it without removing the plate! Also it moves the tripod screw to the optical centerline. The MHG-XT as it is known looks to be a good addition, I am still getting used to mine, not sure I am happy with the feel of the new grip and how it changes how I hold the camera. It is a little bit different grip, but enough to make it a little uncomfortable. It also lacks a L extension for portrait orientation while using a ball head. It is well made but it may not last in my inventory. I think an RRS L-plate will be of more use to me.  Some of you are wondering why I would want an L-plate when the Fuji grip already has the quick release style plate, well when you move a ball head 90° you limit some of the movement, so it is not as easy to position as it is to just reinsert the camera in the portrait orientation from landscape orientation. When using a L-plate in portrait orientation you have a full range of motion available, just like when the camera is rotated to landscape orientation. The MHG-XT is well made and fits the camera very well, a nice addition but still waffling on this one, it just may take some time to get used to it.

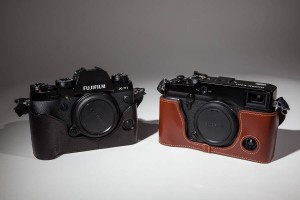
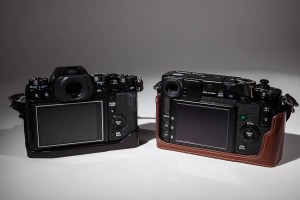
Cases_MG_3010-web

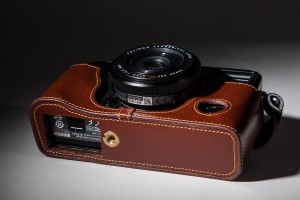
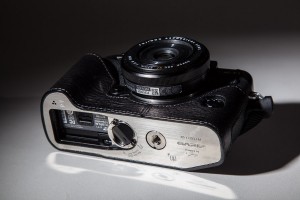
Cases are a mostly cosmetic enhancement, more bling than functionality but there is some utility. I am not a fan of full leather cases in general, but the rangefinder style body in a leather half case just looked cool. I admit it, it was a blast from the retro past with a tinge of hipster that I am loathe to admit. I started with film cameras and manual focus but I never had a rangefinder or used one. I was intrigued with them and I have some older cameras that I inherited that have leather cases. So off to Ebay and a search for some leather cases and I got a tan leather half case for the X-Pro1. It looked nice, it fit nice, it did offer some protection, enough to rationalize its use and a bonus is that added some thickness to the grip and that with the Thumbs Up made for an easy to hold and use setup. The leather case also added a tripod screw, so good to go for tripod use when needed.  There was a bump in the road, the battery door was blocked, you had to remove the case to access the battery and the memory card…. arrrrrrr. So with a little wielding of a sharp knife, some patience and a little blood, there was an access port in the bottom, the case could stay on, at least while being used hand held. it looked good and when doing landscape work I could either place a small release plate on the bottom or for full blown dedicated photon harvesting, change out the case for the L-Plate. Versatility and style……_MG_3011-web

The case for the X-Pro1 worked out so well that I decided after getting the X-T1 to add a leather half case. Gariz was out early with a case designed for the X-T1. Again this was off of ebay directly from Gariz in Korea. Several colors were available, the medium brown was really tempting, however I opted for the black. Fuji also had a leather half case available in black but I heard initial reports that they blocked the SD card door! You had to remove the case to get at the memory card….noooooooo Fuji how could you  have designed this into the case? The Gariz did not block the access to the door or the battery door on the bottom. Gariz also installed a metal bottom plate and added a tripod screw along the centerline of the lens. The on and off is easy with ringed screw to allow tool less installation and removal. The ring on the attachment screw can also double as a ring for sling type strap. After a short time, my airmail package arrived and inside was a nicely made black leather case with a chrome plated bottom plate. The workmanship is excellent and the fit is excellent. What could go wrong? Well actually a minor detail, the half case fit so snugly that it prevented the lcd from tilting. The lcd was hitting the nice bottom padding, you could loosen the attachment screw but that was not a good solution. On the Fuji X-forum another user posted about the same problem and had a brilliant solution, a small paper shim. The shim worked wonderfully, a couple of small pieces of heavy weight paper and that allowed enough space for the lcd to tilt in and out easily. If you are looking for a leather case, I can highly recommend the Gariz case, well made, fits perfectly, well designed and engineered. May need a couple of strips of paper as shim, but that is just a minor issue. Well worth it.

Straps and bags and protection

Well this is a topic that can be a highly personal one, me I am not too fussy with straps. I am mostly concerned with comfort and functionality. How it looks is secondary, yes I know that sounds contradictory when I was nattering about the leather case. It is what it is….. So I use a webbing and padded nylon type strap. Something that looks decent and comfortable, no way am I going to spend $250 on a thin distressed leather strap. I do have limits to my insanity. I have always used neck straps with the camera hanging down to my chest. The Fuji now has me considering to try a wrist strap, something I have always thought I would not like. I am keeping an open mind and will give one a try and see how it works for me in real life.

Bags are a topic for another post, my quest for the “right” bag is still on going. I am not sure that it will ever be finished. Doing photography for over 30 years has taught me there is no perfect bag, yet. I keep hoping. I have gone from shoulder bags, to backbacks with impossible loads. Then to the smallest bag I could fit the mirrorless camera in and now heading towards the messenger type bag. No bag seems to have exactly what I want when I want it. Most of my bags are nylon, I just cannot justify those fine leather cases that are too tiny for use and cost $300-$700. Nope can’t do it. Cameras and optics I will spend the money on, but a bag just because it looks cool and costs $500, no way. A lot of those trendy, hipster style bags of canvas and leather are just not functional enough for the price. There are some that look cool, and I am sure they worth it, but I just cannot justify them. I am sure that some will think I am just dismissing them but I just don’t see the need to spend that much on a bag when there are others that will do the job just as well.

LCD screens on the back of the camera can be a problem depending on how you handle the camera. I always use a protector on the LCD screen, this prevents scratches and accidental marks on the back that may interfere with reviewing images.  It can also affect your view when you use the back of the camera to compose a shot. I do try to handle my cameras carefully but accidents do happen and the more you use a camera the more chances are that something may happen to it. One of my reasons to get the Fuji x-cameras was to have a light weight, easy to carry camera, so I carry it with me almost every day. Wear and tear does happen. LCD screen protectors are cheap insurance, easily replaced and worth every penny.

A soft cloth or wrap can help protect your camera if your bag does not offer enough protection. My Thumbs Up  is starting to show some brass from rubbing through the finishing on the end from caused by the small bag it is usually carried in. When I first got the X-Pro1 I had the three individual primes, so that is what I carried and had a bag just big enough to house them all, so there is a little friction in the bag. Now with more gear I need a bigger bag but a lot less bag than for the dslr.  Also fingers and constant use cause wear and tear and the camera is starting to develop that used patina.

When it was time for my wife to get a new camera, we got her a nice shiny new X-E1 and also added the lcd protector, L-plate, Thumbs Up and soft release. She also thought all of that made for a nice improvement in handling.

So in conclusion there is not a lot of enhancements needed for the X-series cameras,  they are fun, functional and easy to use cameras. Add a Thumbs UP, lcd screen protector and maybe a grip or case and something to carry it all in, is all that is needed for a good time. It will make handling better and I think improve the overall experience.  For the X-T1 there were less gadgets to get Fuji really does listen to user feedback and does change for the better, just look at the firmware updates. A great system to buy into in my opinion. Another add benefit for me is I spend a lot less time looking for gadgets and more time shooting and using the camera, what a great concept. The X-series is made to be used.

MHG-XT

MHG-XT


X-Pro 1 modified leather case

X-Pro 1 modified leather case


Gariz X-T1 half case

Gariz X-T1 half case


Chimps at the Los Angeles Zoo

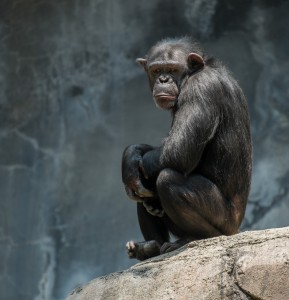
Last month I headed out to the L.A. Zoo. I carried with me my trusty Fuji X-Pro1 and the two zooms, while at the Zoo I have the 55-200mm a good workout. I stopped and spent some time looking and watching the chimps.  They can produce some interesting expressions.  A lot like humans although I am not sure we can apply that many human thoughts to them, it would be interesting to know what they are thinking. This chimp always seems to have a somewhat sad expression. It may be the just the way his lips meet. (click on the image to see a larger version)

Waiting

Waiting

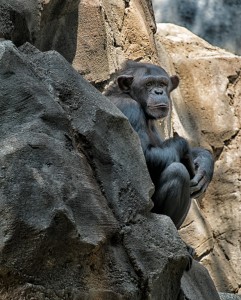
Here again is the same chimp although he has moved over to a small overhang. This looks to me like he has been given a “time-out” and told to sit and watch the others….


Time Out

Time Out

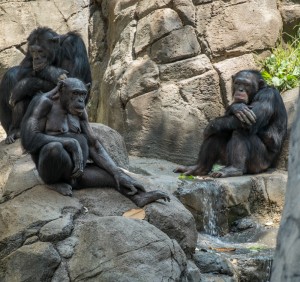
And here is a shot of the family group, all seeming bored and facing yet another day of the summer doldrums. I guess that is life at the Zoo.

Summer Doldrums

Summer Doldrums

Hope you enjoyed these images. Thanks for looking.


Image of the week #52

The final image for this year… been a long road but a fun one. I sure hope that this coming year is better for me and for everyone else as well. This sunset was taken from Laguna Beach after a brief but intense rain storm. It was just starting to clear a little locally but then sun peaked out right as it got close to the horizon. You can see Catalina Island off in the distance. Taken with the Fuji X-Pro 1 and a Samyang 14mm lens. Enjoy and thanks for looking this year at my images, many more to come in the following year. Happy New Year everyone!


Image of the week #51

Well the end of the year is near and the world did not end on the 21st! So we are in the final stretch and it will be nice to start a new year. We are having some on and off light rain which we sure could use. This was taken in a local park. I ended up crawling around on my hands and knees to get this shot. The wet made things a bit chilly but once I got back in the car the heater took over and soon I was warm. Taken with the X-Pro 1 and the 60mm macro lens.


Image of the week #49

Well just a few more weeks left of this year, and a fine year it has been. Here is a shot that I recently processed from my trip to Yellowstone and Montana. This group of aspens was quite nice but I was quite happy with this shot. Fuji X-Pro 1 camera.  Hope you enjoy it too.


Yellowstone NP fall color

At the beginning of October I took a trip with my wife to Montana and Yellowstone National Park. We were a bit late for fall color but there were some areas that had some still hanging around. It was quite cold there and winter was rapidly approaching. Here are few of the fall color landscape shot from the trip. Enjoy.


_DSF3909-Edit-Edit-2-web.jpg_DSF3927-Edit-Edit-web.jpg_DSF3942-Edit-Edit-web.jpg_DSF3957-Edit-Edit-web.jpg_DSF3979-web.jpg_DSF3997-web.jpg_MG_1654-Edit-web.jpg_MG_1667-web.jpg_MG_1676-Edit-web.jpg

Image of the week #48

Hard to believe how fast this year has gone by…seems like it was only summer a few days ago… Well we have been having some rain, but I did not let that stop me, on the way home from work I stopped at a park in Orange and got out and stretched my legs. Even though it was drizzling a little I decided to take my camera, the oaks were in the process of turning color and dropping leaves and strolled past all the dead leaves I noticed a single green leaf among them. I liked the contrasts. Fuji X-Pro 1 and Fuji 60mm f2.4 macro at f2.8.


Image of the week #47

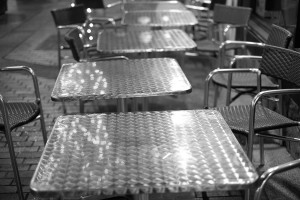
Table for two? Taken in Little Tokyo at one of the malls. Fuji X-Pro 1, 35mm f1.4 lens.


Image of the week #46

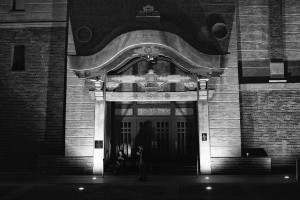
Here is a nice moody image, this building is in downtown Los Angeles, in Little Tokyo. It is the original Japanese-American Museum and the new one is right next door. The lights on this building really make it interesting at night, and it was a rainy night when this was taken. It had just started to rain on me. I was using the black and white mode for the Fuji X-Pro 1 and this just worked out well so I did a little touch up and here it is, as nice moody night shot.